The Measurement Tools ClipArt gallery offers 96 illustrations of instruments used to determine the size of objects.
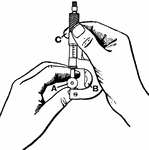
Measuring with 1" inside micrometer.

Micrometer Measuring

Measuring with 1" inside micrometer.

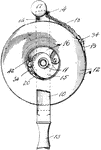
Any of various measuring instruments for measuring a quantity

General Purpose Meter

Any of various measuring instruments for measuring a quantity

"A plate of glass about 2.5 inches square is ruled with twenty-one lines in one direction .1 inch apart, and two lines in the other direction 2 inches apart. The extreme lines of the set therefore form a perfect square of 2 inches. These lines are ruled with exceeding accuracy and care, but provision is left for ascertaining any errors that remain either as to distance or want of perfect squareness." —The Encyclopedia Britannica, 1903

Micrometer

"A plate of glass about 2.5 inches square is ruled with twenty-one lines in one direction .1 inch apart,…

Micrometer

Micrometer

Micrometer

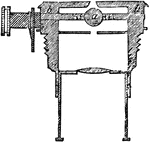
"The vertical section in the direction of the axis of the telescope. The eye-piece ab consists of two planoconvex lenses a, b, of nearly the same focal length, and with the two convex sides facing each other. They are placed at a distance apart less than the focal length of a, so that the wires of the micrometer, which must be distinctly seen are beyond b. The eye-piece slides into the tube cd, which screws into the brass ring ef, through two openings in which the oblong frame, containing the micrometer slides, passes." —The Encyclopedia Britannica, 1903

Micrometer

"The vertical section in the direction of the axis of the telescope. The eye-piece ab consists of two…

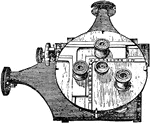
"The original Merz micrometer of the Cape Observatory, made on Fraunhofer's model. S is the head of the micrometer screw proper, s that of the screw moving the slide to which the so-called "fixed web" is attached, s' that of a screw which moves the eye-piece E. C is the clamp and M the slow motion in position angle, L, L are tubes attached to a larger tube N; the latter fits loosely on a strong hollow cylinder which terminates in the screw V. By this screw the whole apparatus is attached to the telescope." —The Encyclopedia Britannica, 1903

Micrometer

"The original Merz micrometer of the Cape Observatory, made on Fraunhofer's model. S is the head of…

"A plan of this slide; the divided drum of the screw is omitted for sale of clearness. The screw S has a shoulder at k, carefully fitted and ground to a bearing so as to work sweetly in a hole in the very strong spring o o; the other extremity of the screw is formed into a pivot, which fits a hole in the brass piece B B. The end of this pivot—hrdened, polished, and slightly rounded—rests on the flat surface of an agate a, which is imbedded in the end of the slide, and kept firmly in its place by the brass piece B B." —The Encyclopedia Britannica, 1903

Micrometer

"A plan of this slide; the divided drum of the screw is omitted for sale of clearness. The screw S has…
"a is the sphere, placed in half-holes on the axis bb, so that when its principal axis is parallel to the axis the telescope it gives only one image of the object. In a direction perpendicular to that axis it must be so placed that when it is moved by rotation of the axis bb the separation of the images shall be parallel to that motion. The angle of rotation is measured on the grduated circle C. The angle between the objects measured is = r sin 20, where r is a constant to be determined for each magnifying power employed." —The Encyclopedia Britannica, 1903

Micrometer

"a is the sphere, placed in half-holes on the axis bb, so that when its principal axis is parallel to…
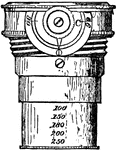

"The horizontal section in the direction of the axis of the telescope. The eye-piece ab consists of two planoconvex lenses a, b, of nearly the same focal length, and with the two convex sides facing each other. They are placed at a distance apart less than the focal length of a, so that the wires of the micrometer, which must be distinctly seen are beyond b. The eye-piece slides into the tube cd, which screws into the brass ring ef, through two openings in which the oblong frame, containing the micrometer slides, passes." —The Encyclopedia Britannica, 1903

Micrometer

"The horizontal section in the direction of the axis of the telescope. The eye-piece ab consists of…

Measuring with 2" inside micrometer.

Micrometer

Measuring with 2" inside micrometer.

Gear tooth depth micrometer.

Depth Micrometer

Gear tooth depth micrometer.

Reading a micrometer.

Reading a Micrometer

Reading a micrometer.

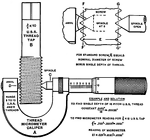
Measuring with thread micrometer.

Thread Micrometer

Measuring with thread micrometer.

A tool used to measure a flat plane.

Planimeter

A tool used to measure a flat plane.

The flat scales are more convenient than the scales on the stick due to the delay in finding the correct scale.

Single Scale Ruler

The flat scales are more convenient than the scales on the stick due to the delay in finding the correct…

A shaper micrometer scale by clamping onto the material to measure the thickness reading the rotation dial at (C).

Shaper Clamp Micrometer Scale

A shaper micrometer scale by clamping onto the material to measure the thickness reading the rotation…

A shaper micrometer scale measuring cross—feed spindle to measure the diameter by reading the raised ruler.

Shaper Spindle Micrometer Scale

A shaper micrometer scale measuring cross—feed spindle to measure the diameter by reading the raised…

Top and side views of mechanical drawing scales.

Scales

Top and side views of mechanical drawing scales.

Spring scales are used to weigh articles in which a high degree of exactness is not required. Spring scales measure weight only, not mass.

Spring Scales

Spring scales are used to weigh articles in which a high degree of exactness is not required. Spring…

A scleroscope is a device used to measure rebound hardness. It consists of a diamond-tipped hammer dropped from a fixed height. The device was invented in the early 1900s.

Scleroscope

A scleroscope is a device used to measure rebound hardness. It consists of a diamond-tipped hammer dropped…
Transferring a setting between inside calipers and outside calipers.

Transfer Setting with Calipers

Transferring a setting between inside calipers and outside calipers.

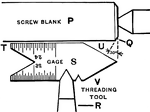
Setting US standard or sharp V-threaded tool at right angles with work.

Setting Standard

Setting US standard or sharp V-threaded tool at right angles with work.

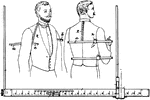
This tailors measure is a measuring device for cloth cutters. A tailor is a person who makes, repairs, or alters clothing professionally.

Gradually Marked Tailors Measure

This tailors measure is a measuring device for cloth cutters. A tailor is a person who makes, repairs,…
A flexible form of ruler. It consists of a ribbon of cloth, plastic, fiber glass, or metal strip with linear

Measuring Tape

A flexible form of ruler. It consists of a ribbon of cloth, plastic, fiber glass, or metal strip with…

A worker testing taper with special gage.

Testing Taper

A worker testing taper with special gage.

Testing thickness of flanges with universal dial indicator. The indicator A clamped to rod B is set for measuring the error of work C. With the contact point D touching a standard gauge black or standard piece of work, the needle is set to zero. When the work in moved beneath the gauge, the needle shows the amount of oversize or undersize.

Testing Thickness

Testing thickness of flanges with universal dial indicator. The indicator A clamped to rod B is set…

Counting the trace of a thread.

Trace of a Thread

Counting the trace of a thread.

Sectional view of whitworth screw thread.

Whitworth Thread

Sectional view of whitworth screw thread.

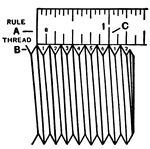
Counting threads with steel rule.

Counting Threads

Counting threads with steel rule.

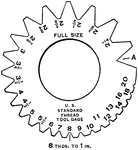
Gauge for US thread tool.

Thread Tool

Gauge for US thread tool.

This truck weighing scale is a scale that is able to weigh the entire contents placed on the truck.

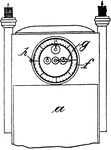
Weighing Truck

This truck weighing scale is a scale that is able to weigh the entire contents placed on the truck.

Measuring chordal thickness with gear tooth vernier.

Tooth Vernier

Measuring chordal thickness with gear tooth vernier.

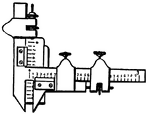
Gear tooth vernier.

Tooth Vernier

Gear tooth vernier.

Inspecting work with adjustable limit snap gages.

Inspecting Work

Inspecting work with adjustable limit snap gages.

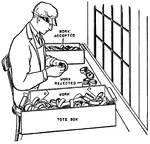
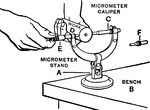
Measuring work on bench with micrometer.

Measuring Work

Measuring work on bench with micrometer.