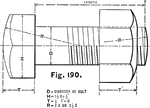
An illustration of the hexagonal bolt head showing measurements. The measurement of diameter, D, is used to calculate the dimensions. The diameter of the head and the nut, H, is 1 ½D ₌ ⅛, and the distance of T is half the diameter.

U.S. Standard Hexagonal Bolt Head

An illustration of the hexagonal bolt head showing measurements. The measurement of diameter, D, is…
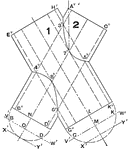
Auxiliary planes of two intersecting cylinder is drawn by drawing the first cylinder. Revolve the first cylinder onto itself to create two intersections.

Drawing Auxiliary Planes of Two Intersecting Cylinder

Auxiliary planes of two intersecting cylinder is drawn by drawing the first cylinder. Revolve the first…
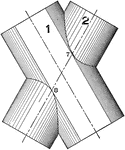
An outside view of two cylinders intersecting in an auxiliary plane. The dotted lines is the center of each cylinders.

Outside View of Auxiliary Planes of Two Intersecting Cylinder

An outside view of two cylinders intersecting in an auxiliary plane. The dotted lines is the center…
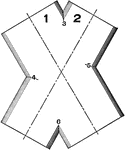
A sliced view at point VW, shown in the top figure. The inside view of the cylinders shows the points where the cylinders are connected.

Sliced View of Auxiliary Planes of Two Intersecting Cylinder

A sliced view at point VW, shown in the top figure. The inside view of the cylinders shows the points…
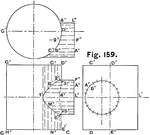
An illustration of two intersecting cylinders viewed from the side, top, and side of the intersecting cylinder. The intersecting cylinder drawing in mechanical and engineering drawings to show either a tank or pipes.

Three Views of Two Intersecting Cylinder

An illustration of two intersecting cylinders viewed from the side, top, and side of the intersecting…

A representation of the square threaded nut and screw. The left image shows the threaded screw with a continuous helix drawn. The nut is cut in half to show how the threads are drawn with respect to the screw.

Diagram of Square Thread Nut and Screw

A representation of the square threaded nut and screw. The left image shows the threaded screw with…

A screw head with detailed measurements for accurate drawing. These measurements are based off the diameter of the overall screw and the head.

Diagram of Screw Head

A screw head with detailed measurements for accurate drawing. These measurements are based off the diameter…
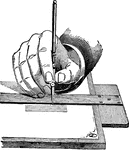
"For drawing ink lines other than arcs of circles, the ruling pen is used. It should be held as nearly perpendicular to the board as possible, bearing lightly against the T square or triangle, along the edge of which the line is drawn. After a little practice, this position will become natural, and no difficulty will be experienced." — Hallock, 1905

Ruling Pen

"For drawing ink lines other than arcs of circles, the ruling pen is used. It should be held as nearly…
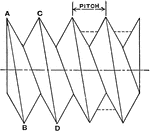
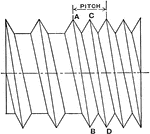
An illustration of the V thread screw. The screw is drawn by connecting the two opposite points of the thread to create the required pitch.

Conventional V Thread Screw

An illustration of the V thread screw. The screw is drawn by connecting the two opposite points of the…
A double thread screw drawn by drawing diagonal lines in between the pitch. The double thread screw is a screw with threads bunched together between the pitch.

Double Thread Screw

A double thread screw drawn by drawing diagonal lines in between the pitch. The double thread screw…
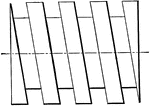
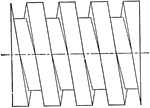
Illustration of a common representation for square thread screw. The screw is drawn in two dimensions and used in drafting plans and mechanical drawing.

Square Thread Screw Mechanical Drawing Representation

Illustration of a common representation for square thread screw. The screw is drawn in two dimensions…
A close up of a square thread on a screw. This representation shows the correct an accurate three dimensional view of the screw.

Square Thread Screw

A close up of a square thread on a screw. This representation shows the correct an accurate three dimensional…
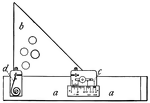
"A draftsman's instrument for ruling parallel lines. It consists of a triangle so attached to a straight-edge that it can be moved back and forth on it a distance predetermined by the adjustment of a set-screw. a, a straight-edge; b, triangle moving on <i>a</i> for a distance determined by the set of the micrometer scale <i>c</i>; d, spring for releasing triangle and keeping it in the end of its slot." -Whitney, 1889

Section Liner, A Draftsman's Tool

"A draftsman's instrument for ruling parallel lines. It consists of a triangle so attached to a straight-edge…
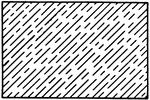
Mechanical drawing convention for identifying Aluminum. Using conventionalized patterns to identify materials is called section lining.

Aluminum

Mechanical drawing convention for identifying Aluminum. Using conventionalized patterns to identify…

Mechanical drawing convention for identifying brick. Using conventionalized patterns to identify materials is called section lining.

Brick

Mechanical drawing convention for identifying brick. Using conventionalized patterns to identify materials…
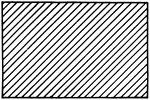
Mechanical drawing convention for identifying cast iron. Using conventionalized patterns to identify materials is called section lining.

Cast Iron

Mechanical drawing convention for identifying cast iron. Using conventionalized patterns to identify…

Mechanical drawing convention for identifying cast steel. Using conventionalized patterns to identify materials is called section lining.

Cast Steel

Mechanical drawing convention for identifying cast steel. Using conventionalized patterns to identify…
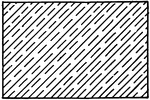
Mechanical drawing convention for identifying composition materials. Using conventionalized patterns to identify materials is called section lining.

Composition

Mechanical drawing convention for identifying composition materials. Using conventionalized patterns…

Mechanical drawing convention for identifying concrete. Using conventionalized patterns to identify materials is called section lining.

Concrete

Mechanical drawing convention for identifying concrete. Using conventionalized patterns to identify…
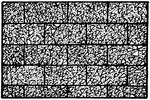
Mechanical drawing convention for identifying concrete blocks. Using conventionalized patterns to identify materials is called section lining.

Concrete Blocks

Mechanical drawing convention for identifying concrete blocks. Using conventionalized patterns to identify…
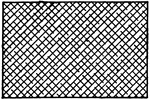
Mechanical drawing convention for identifying copper. Using conventionalized patterns to identify materials is called section lining.

Copper

Mechanical drawing convention for identifying copper. Using conventionalized patterns to identify materials…

Mechanical drawing convention for identifying fire brick. Using conventionalized patterns to identify materials is called section lining.

Fire Brick

Mechanical drawing convention for identifying fire brick. Using conventionalized patterns to identify…

Mechanical drawing convention for identifying insulating material. Using conventionalized patterns to identify materials is called section lining.

Insulating Material

Mechanical drawing convention for identifying insulating material. Using conventionalized patterns to…

Mechanical drawing convention for identifying malleable iron. Using conventionalized patterns to identify materials is called section lining.

Malleable Iron

Mechanical drawing convention for identifying malleable iron. Using conventionalized patterns to identify…
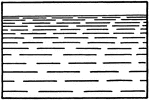
Mechanical drawing convention for identifying water. Using conventionalized patterns to identify materials is called section lining.

Water

Mechanical drawing convention for identifying water. Using conventionalized patterns to identify materials…

Mechanical drawing convention for identifying wood. The left side of the illustration shows an endgrain pattern; the right side shows the figure of the wood. Using conventionalized patterns to identify materials is called section lining.

Wood

Mechanical drawing convention for identifying wood. The left side of the illustration shows an endgrain…

Mechanical drawing convention for identifying wrought iron. Using conventionalized patterns to identify materials is called section lining.

Wrought Iron

Mechanical drawing convention for identifying wrought iron. Using conventionalized patterns to identify…
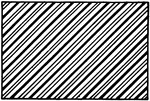
Mechanical drawing convention for identifying wrought steel. Using conventionalized patterns to identify materials is called section lining.

Wrought Steel

Mechanical drawing convention for identifying wrought steel. Using conventionalized patterns to identify…
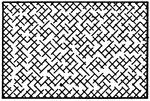
Mechanical drawing convention for identifying zinc. Using conventionalized patterns to identify materials is called section lining.

Zinc

Mechanical drawing convention for identifying zinc. Using conventionalized patterns to identify materials…
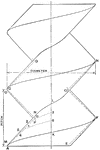
The illustration detailing of a screw thread. Threads are created by drawing a cylindrical shape at a constant diameter. The pitch, length between the threads, is drawn along the cylinder at an angle.

Drawing Screw Thread

The illustration detailing of a screw thread. Threads are created by drawing a cylindrical shape at…