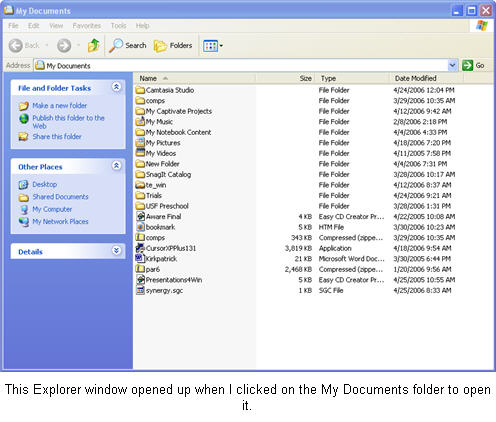
Windows Explorer is the file management application in Windows. Windows Explorer can be used to navigate your hard drive and display the contents of the folders and subfolders you use to organize your files on your hard drive. Windows Explorer is automatically launched any time you open a folder in Windows XP.
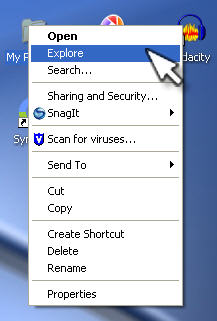
You can also right-click on a folder and select Explore to open that folder using Windows Explorer.
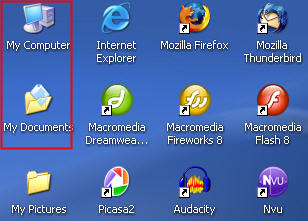
You may already have some shortcuts on your desktop that point to locations on your hard drive you will frequently use with Windows Explorer, such as My Computer and My Documents.
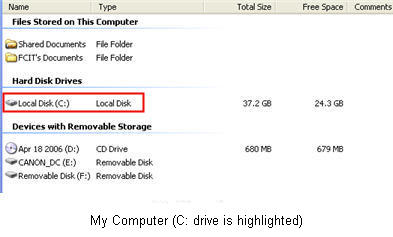
My Computer shows you a list of all the drives installed on your system, including floppy drives and USB drives. The drive on which Windows is installed is usually displayed as the C: drive when you double-click on My Computer to open it using Windows Explorer.
My Documents shows the location where Windows saves documents by default when you save them from an application such as Microsoft Word. Windows XP is a multi-user system, meaning that several users can use the same computer and each will have their own My Documents Folder. You can view the folders for all the users who have accounts on your computer by opening the folder Documents and Settings, which is on the root (or upper-most level) of your C: drive.
Under Documents and Settings, Windows creates a folder with the login name of each user who has an account on your computer. Each user’s folder will have a subfolder named My Documents used to save any files they create.

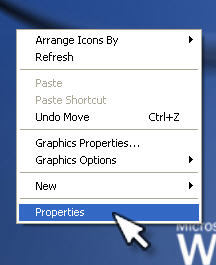
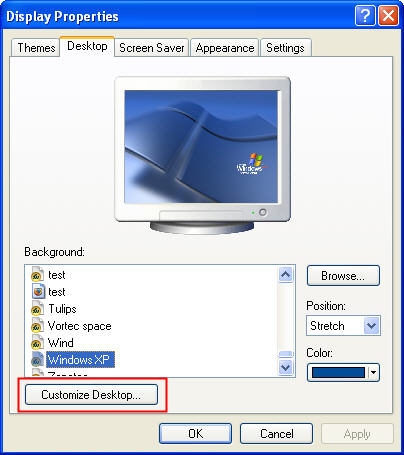
If you do not see these shortcuts for My Computer and My Documents on your desktop, you can make them visible by right-clicking on an empty area of your desktop and selecting Properties, then clicking on the Desktop Tab, and finally the Customize Desktop button.
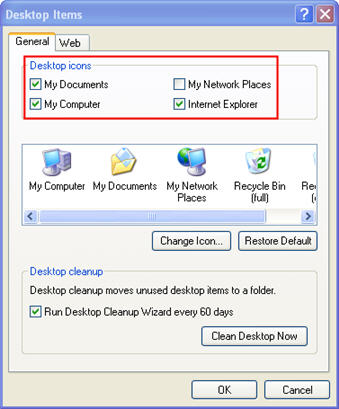
At the top of the window, you will see a series of checkboxes you can check to make the My Computer and My Documents shortcuts visible on your desktop.
To launch Windows Explorer, simply click on one of these shortcuts once they are visible on your desktop or right-click and select Explore.
The Windows Explorer interface has several parts to it:
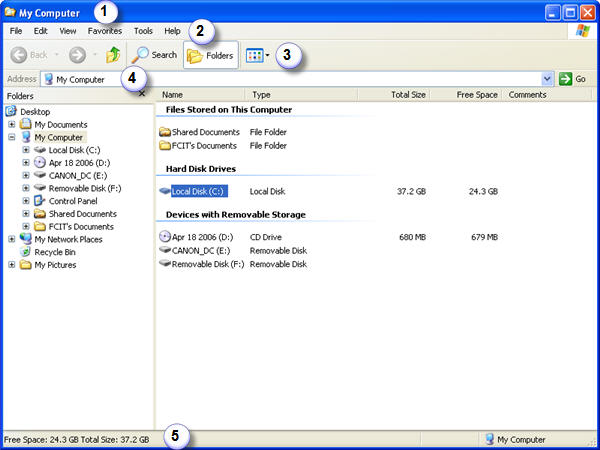
- The Title Bar: shows you the folder you are currently in. You can also set the title bar to display the full path to your folder (choose Tools, Folder Options, View and then check the box next to Display the full path in the title bar).

The path tells you the drives, folders and subfolders you would have to open to get to this folder, beginning with the root of the drive. For example, the path to your My Documents folder might be C:\Documents and Settings\yourusername\My Documents.
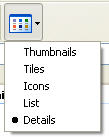
- The Menu Bar: this area of the interface includes the menu options you will use while working with your files and folders. One of the menus you will use the most is the View menu. You can use the options listed under this menu option to change how the contents of your folders are displayed in the main Explorer window.

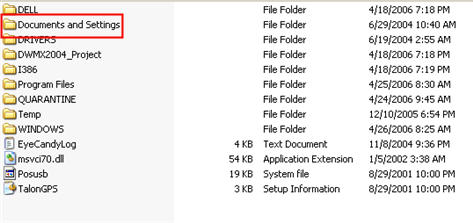
You can display thumbnails (useful if your folder contains a lot of pictures), icons (which are listed from left to right), a list (which contains smaller icons displayed in columns from top to bottom), and details (which displays columns with additional information about each file or folder such as the time it was last modified and its size). You can also use the Arrange Icons by option to change the way your files and folders are sorted in the main Explorer Window.
- The Standard Toolbar: contains buttons that duplicate many of the tasks you can perform using the options in the Menu Bar. For example, you can click on the Views button to change the display in the main Explorer window.
- The Address Bar: like the Title Bar, the Address Bar can be set to display the full path to a folder (Tools, Folder Options, View and then check the box next to Display the full path in the address bar). You can enter the path to a folder or subfolder in the Address Bar and Explorer will open it for you in the main Window.
- The Status Bar: the bottom portion of the Explorer window displays information about the folder you have open, such as the number of objects (the number of files and subfolders in that folder) and the size.
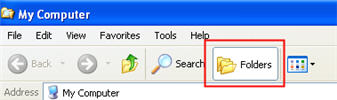
The main Explorer window is divided into two panes. The contents of your folders are displayed on the right. By default, the pane on the left displays a list of common tasks you might want to perform when you open a folder, such as moving, renaming, and copying. You can also set this pane to display a hierarchical list of the folders on your hard drive. You can do this by clicking on the Folders button in the Standard Toolbar or by selecting View, Explorer Bar, Folders.
Any folders that have a plus sign next to them have subfolders in them. To view the subfolders, just click on the plus sign and the folder will expand to reveal the subfolders below the folder’s name. The plus sign then turns to a minus sign to allow you to collapse the contents of the folder.
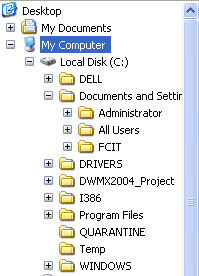
When you select a folder, its contents are displayed on the right pane.

You can then use drag and drop to move and copy files on your hard drive. You can drag files or folders from one location to another to move them, while holding down the Control key when dragging copies the files or folders.
You can select multiple files or folders using two handy keyboard shortcuts. To select several contiguous files, select the first file then hold down the Shift key and select the last file. All the files in between will be selected so you can copy or move them. To select several non-contiguous files, hold down the Control key while you select each file or folder.