Your school may have a typical Ethernet network that uses “Category 5” cables to connect the computers to the network, or it may have a newer wireless network.
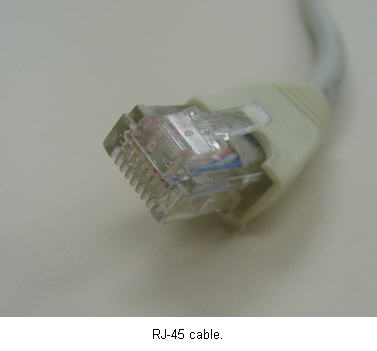
Most classrooms in your school will have one or more data jacks on the wall where you can connect a computer to the network using a Category 5 patch cable. Cat 5 cables have RJ-45 connectors at both ends. These cables look like the cables you use to connect your phone to the outlet on the wall, but with wider connectors.
Before you can connect your computer to the network using a Cat 5 cable, you will need to make sure you have an Ethernet network adapter installed on your computer. Most Macs have an integrated network adapter which will often be found near the USB connectors on the back of your desktop’s case, or next to the phone line connector on the back or side of your laptop’s case.
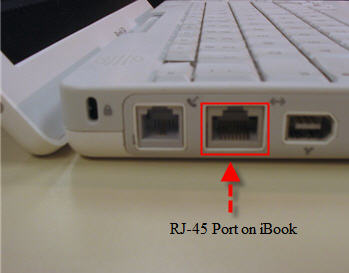
To connect to the network, plug one end of the Cat 5 cable into your computer’s network card, then plug the other end into the network port on the wall. The network card should have a blinking light on it to let you know that it is active and receiving a network signal. You can then open up a web browser and open up a web page to test your network connection.
With wireless networks, OS X is set up to require minimum configuration. All you need to do is to be within range of a wireless signal to be able to access the internet using your computer’s wireless network adapter. The wireless signal can be provided by an Apple Airport wireless hub, or any hub that can broadcast a signal compatible with your wireless network card.
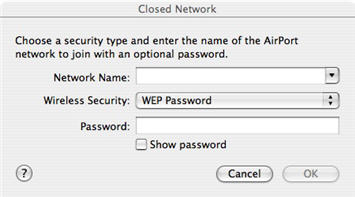
When you are within range of a wireless network, you may get a prompt if it’s the first time you connect to that network. If the network is set up to be a secured network, you may need to enter a password before you are allowed to connect. You have the option of saving this password so that you do not have to enter it each time you reconnect to the network.
You may see an icon with curved bars in the menu bar once you connect to a wireless network.

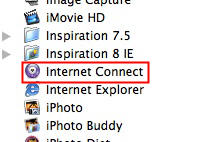
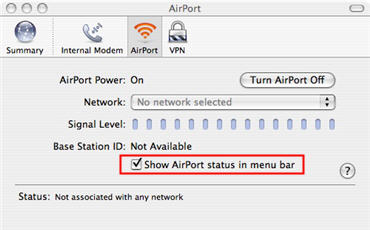
This icon is a utility that lets you manage the different options for your wireless card. If you do not see the status icon, you may have to open the Internet Connect utility from the Applications folder, then make sure Show Airport status in menu bar is selected.
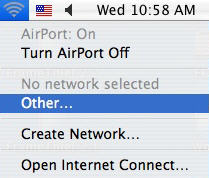
You can use the wireless status utility to switch wireless networks, if there are several networks within range. To switch networks, click on the icon to open a drop-down menu, then select the name of the network you want to switch to. If you do not see the wireless network you want to join listed, click on Other to open up a dialog box where you can enter the name of the wireless network and select the type of wireless security used.
You may want to switch if you know one of the networks is closer to you and will have a stronger signal.
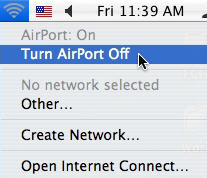
You can also use the utility to switch between wired and wireless networks. OS X will usually do this automatically when a network cable is plugged into the Mac, but you can also force it to use the wired network connection by turning off the wireless card. To switch to the wired network, open the drop-down menu by double-clicking on the wireless status icon, then select Turn Airport Off. You will then be connected only through a wired connection.