NOTE: As of March 16, 2016, Google ceased to support Picasa and encouraged users to migrate to Google Photos. The Picasa application will continue to function, however, and can still be used by those who prefer it. We are maintaining the Picasa posts within TechEase because we find that many people are still using the application and come to the TechEase site looking for the specific help we offer.
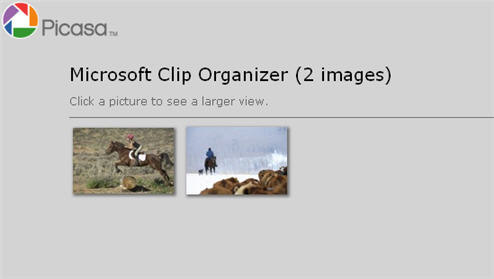
Picasa can be used to create a web gallery that can be uploaded to any web server. A web gallery consists of a web page that displays thumbnails of the pictures you select in Picasa. The webpage also allows the person viewing the gallery to click on a thumbnail to open a larger version of the picture. Controls are also created by Picasa so that the person viewing the gallery can easily navigate through the pictures or return to the main page with the thumbnails.
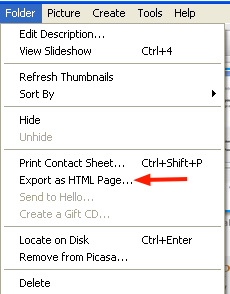
To create a new web gallery, select the pictures you want to use (you can select more than one picture by pressing and holding down the Shift key as you make your selections). Next, select Folder, Export as HTML Page.
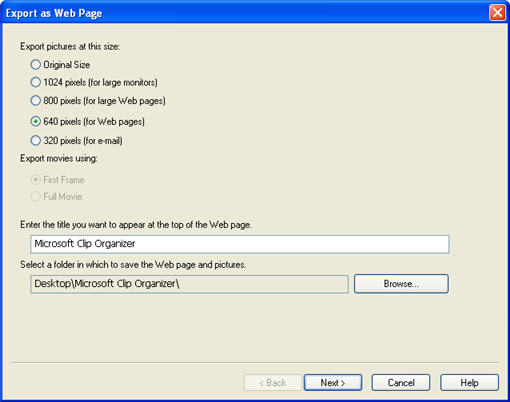
In the screen that opens up, select the size for your exported pictures, and enter a title for the web page. You should also select a folder where you want to store the web pages that will make up your gallery (the main page with the thumbnails and the individual pages with the larger versions).
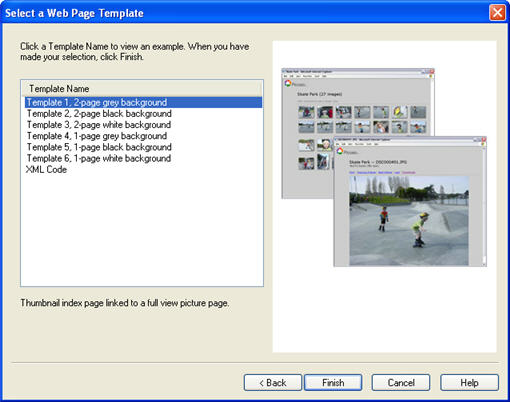
Click on Next and then select a template from the list on the left. A preview on the right shows you waht the web pages created by Picasa will look like.
When you are done with your selection, click on Finish and Picasa will open up your main thumbnails page using your default web browser. You can then use an FTP program to upload the folder containing your web gallery to a web server.