QuickTime Player, the default media player for Mac OS X, also has some powerful recording capabilities. With the recording features, you can create brief tutorials for your students that demonstrate common tasks they need to know how to complete on their computers (saving assignments, navigating the class website, etc.).
- QuickTime Screen Recordings Video Tutorial
- Video Tutorial: Bigger Version (.mov, 5 MB)
- Directions (HTML)
- Print Directions (Tagged PDF)
To create a new screen recording with QuickTime Player:
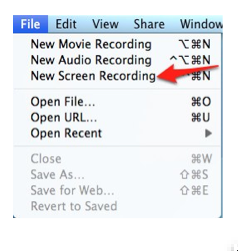
- Launch QuickTime Player and choose File, New Screen Recording (the keyboard shortcut is Control, Command, N).
- Press the Record button.
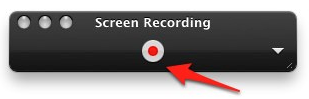
- A screen with additional instructions will appear. Choose Start Recording and begin your tutorial.
- When you’re finished, click on Stop Recording on the Menu Bar.

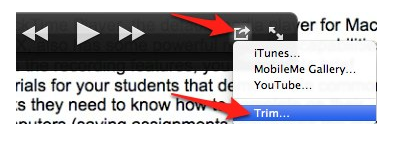
- To edit your recording, click on the arrow on the right side of the QuickTime controller at the bottom of the window and choose Trim.
- Drag the handles to select only the frames you want to keep in your recording.
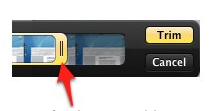
- When you’re happy with your selection, choose Trim. The grayed out frames will be removed from the beginning or end of your recording.
- To save your edited tutorial, choose File, Save As.
- Select a format and save location, then choose Save. Your tutorial will be ready for upload to a website where students can access it.