Adding white space around your images can make it easier for the PDF Maker to properly tag your documents for accessibility when it does the conversion from Microsoft Word to the PDF document format.One way to add white space is by placing your cursor immediately after each image and adding a few carriage returns. However, a better way to add the white space is to use the Paragraph Styles built into Microsoft Word.
- Improving PDF Conversion with White Space Video Tutorial
- Video Tutorial: Bigger Version (.mov, 5 MB)
- Directions (HTML)
- Print Directions (Tagged PDF)
To add white space around an image using Paragraph Styles:
- In the Ribbon, select the Home tab, then in the Styles section select Change Styles.

- Select Paragraph Spacing and choose one of the built-in styles. As you select each style set, you should see a real time preview in the document window (no spacing, compact, tight, relaxed, double, etc).
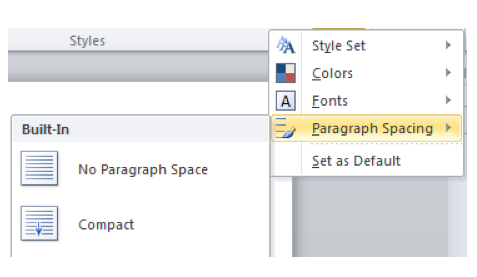
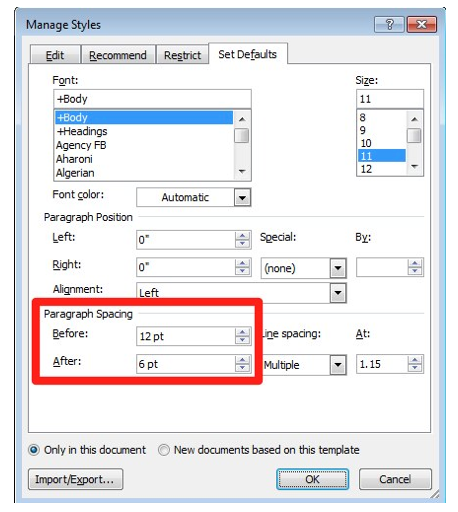
- To customize the spacing, choose Custom Paragraph Spacing at the bottom of the list.

- In the Manage Styles window, enter the amount of desired white space in the Before and After fields found under Paragraph Spacing.
After you add the white space you should notice more separation between your images and the surrounding text, as well as between your paragraphs. This can make the paragraphs stand out so that they are easier to read.