To make sure that your Microsoft Word documents are properly tagged for accessibility when you export them to the PDF format, you should enable the accessibility preferences for the PDF Maker.
- PDF Export from Word and Accessibility Video Tutorial
- Video Tutorial: Bigger Version (.mov, 5 MB)
- Directions (HTML)
- Print Directions (Tagged PDF)
To enable the accessibility options for the PDFMaker in Microsoft Word 2010:
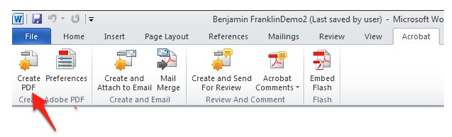
- Open your Microsoft Word document and select the Acrobat tab in the Ribbon.
- Choose Preferences.

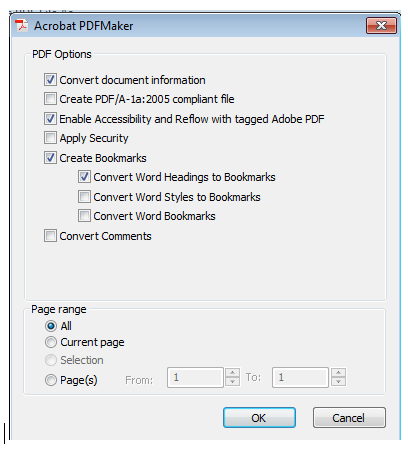
- Make sure the box next to Enable Accessibility and Reflow with Tagged Adobe PDF is checked. This option will add the proper tags for headings, lists, hyperlinks and other structural elements to your PDF document when you export it.

- If you choose to restrict copying and printing, make sure that you check the box next to Enable text access to screen reader devices for the visually impaired in the Security tab. This will ensure you do not block access to people with visual disabilities who need a screen reader to have the PDF document read aloud.

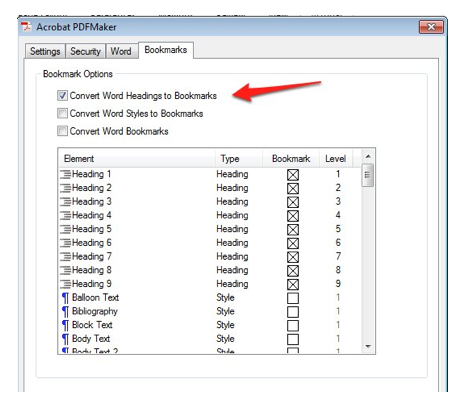
- In the Bookmarks tab, enable the options for Convert Word Headings to Bookmarks and Convert Word Bookmarks. By converting headings to bookmarks and including Word bookmarks you can provide additional navigation for the document. This is especially helpful with long documents.
- Click on OK to close the Preferences window.
To export your Word document to PDF format, choose Create PDF in the Acrobat tab of the ribbon. You will be asked to choose a save location for the new PDF document.
Note that you can change the accessibility options for an individual PDF document by choosing Options in the Save As window.
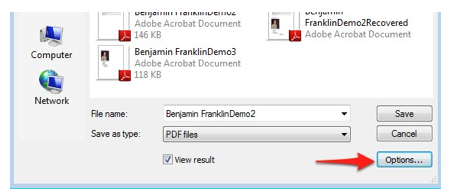
This will bring up a window with the same accessibility settings found in the PDF Maker Preferences.