Adding a printer to your computer involves two steps: making the connection from the computer to the printer using either a parallel or USB cable, and installing the software needed to allow your computer to communicate with the specific printer you want to use.
Most printers sold today support USB, which can transfer data much faster than the older parallel connector. If you have an older printer, you may only have the parallel connector as a connection option.
https://etc.usf.edu/te_win/i/cnctprnt.gif
The first step to adding a printer is to make sure the cables are securely connected on both ends (computer and printer).
Once you have physically connected the printer, you will also need to install the software needed to allow the computer to send print jobs to it. This software is often supplied on a disk by the printer’s manufacturer, but most printers will work with the drivers supplied with Windows XP. The driver software provided by the manufacturer may add extra features, such as giving you information about the ink levels.
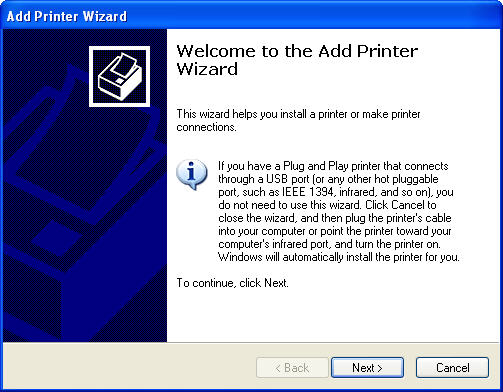
To install a new printer with Windows XP’s Add Printer Wizard, follow these steps:
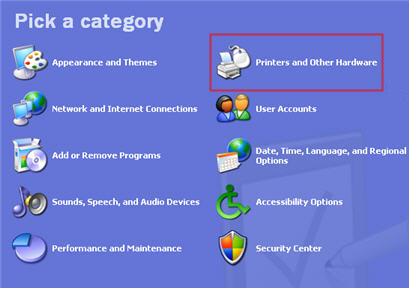
- Click the Start button on the Windows taskbar and then click Control Panel on the right side of the Start menu.
- Click the Printers and Other Hardware hyperlink if the Control Panel window is in Category View. Otherwise, double-click the Printers and Faxes icon if the Control Panel window is in Classic View.
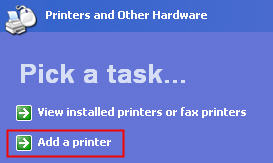
- Click on the Add a Printer hyperlink in the Printers and Other Hardware window to start the Add Printer Wizard and then click the Next button or press Enter to advance to the Local Printer or Printer Connection dialog box. If you are in Classic View, start the wizard by clicking on the Add a Printer option on the left, under Printer Tasks.
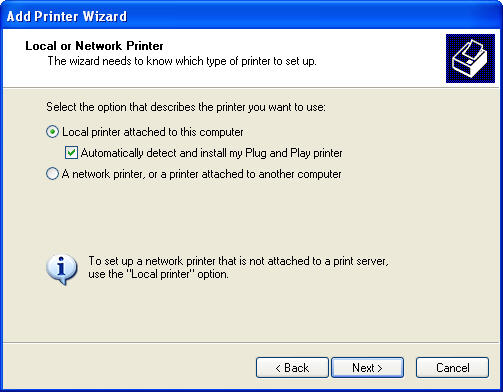
- Make sure that the Add Printer Wizard selects the Local Printer radio button, and that the Automatically Detect and Install my Plug and Play Printer check box beneath this radio button is also selected before you click the Next button.
- If the wizard is unable to detect your printer in the New Printer Detection dialog box, click Next to install the printer manually.
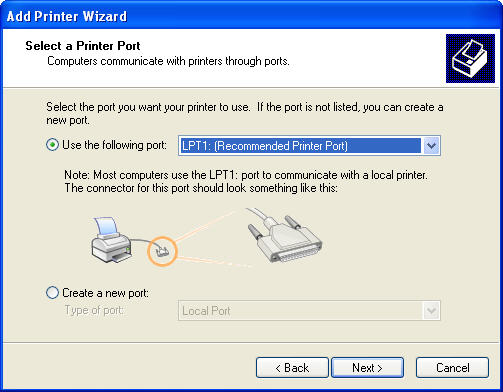
- Select the port for the printer to use in the Use the Following Port drop-down menu in the Select a Printer Port dialog box and then click the Next button. You should select either LPT1 (if you are connecting your printer using a parallel connector) or USB.
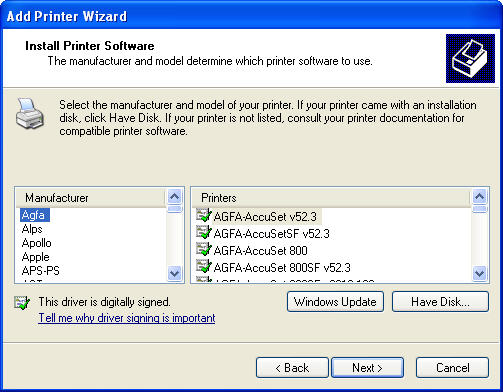
- Click the manufacturer and the model of the printer in the Manufacturers and Printers list boxes, respectively. If you have a disk with the software for the printer, put it into your floppy or CD-ROM drive and then click the Have Disk button: Select the drive that contains this disk in the Copy Manufacturer’s Files drop-down menu and then click OK.
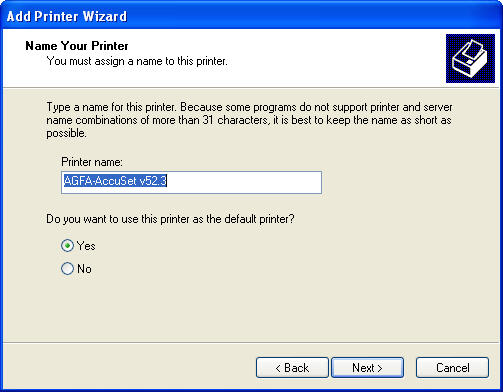
- Click the Next button to advance to the Name Your Printer dialog box. If you want, edit the name for the printer in the Printer Name text box. If you want to make the printer that you’re installing the default printer that is automatically used whenever you print from Windows or from within a Windows program, leave the Yes radio button selected beneath the heading, Do you want your Windows-based programs to use this printer as the default printer?
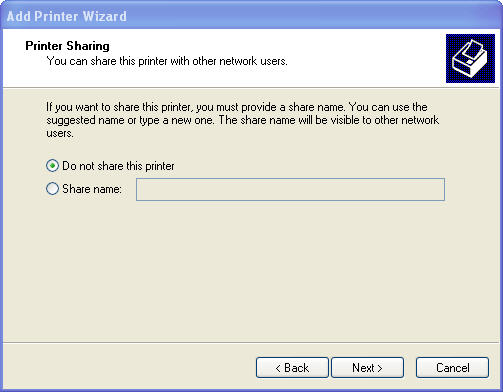
- Click the Next button to advance to the Printer Sharing dialog box. If you want to share this printer with other users on the network, click the Share Name radio button and then, if you want, edit the share name that the wizard gives the printer in the Share Name text box (this is the name that the other users on the network will see when they go to select this printer for printing their documents).
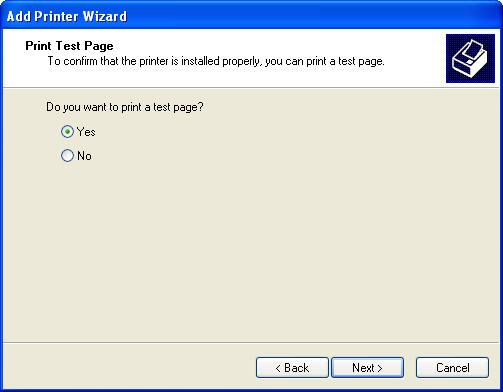
- Click the Next button to advance to the Print Test Page dialog box. To print a test page from your newly installed printer, make sure the Yes radio button is selected in this dialog box.
- Click the Next button to advance to the Completing the Add Printer Wizard dialog box, where you can review the settings for your new printer before you click the Finish button or press Enter to finish installing the new printer.
