NOTE: As of January 10, 2017, Microsoft ceased to support Windows Movie Maker. The Windows Movie Maker application will continue to function, however, and can still be used by those who prefer it. We are maintaining the Movie Maker posts within TechEase because we find that many people are still using the application and come to the TechEase site looking for the specific help we offer.
CAUTION: While installation files that were downloaded directly from Microsoft are safe, there are now many reports of non-Microsoft scam websites offering malware versions of Movie Maker for download. While this malware may function at first, it eventually will demand payment for functions such as saving a file. Never download software from an untrusted source.
Windows Movie Maker is the video editing program that is included with Windows XP. Windows Movie Maker allows you to quickly build a personalized movie that incorporates video, still images, background music, and narration. This movie can be customized further by adding titles, transitions, and video effects.
Windows Movie Maker was designed to be easy to use even if you don’t have any experience with video editing. The program includes a task pane that guides you step-by-step through the three steps involved in creating a movie:
- capturing video from your camera or importing it from a hard drive or other storage device.
- assembling the video clips and other resources into a movie using the Timeline or Storyboard.
- exporting the finished movie into a format that can be shared with other people.
To get started with Windows Movie Maker, open the program by going to Start > All Programs > Windows Movie Maker (or Start > Programs if you have your Start menu set to Classic).

The Windows Movie Maker interface is divided into four main areas:
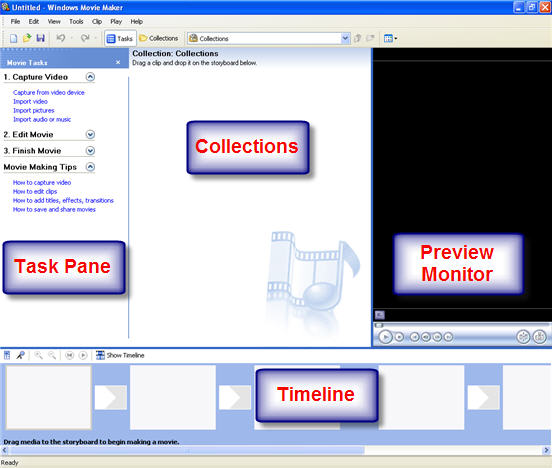
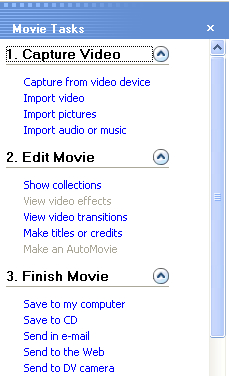
- The Movie Tasks Pane provides an outline of the video editing process in Windows Movie Maker. Each of the three steps listed in the Movie Tasks Pane (Capture Video, Edit Movie, and Finish Movie) includes links for the tasks you would perform for that step. When you click on any of these links, Windows Movie Maker will start a wizard that will guide you through the task.
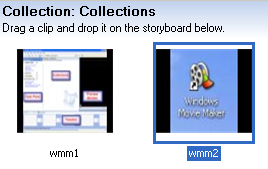
- The Collections area shows you thumbnails of the video clips, still images, and sound files you have captured or imported into Windows Movie Maker. Windows Movie Maker includes special collections with transitions and video effects you can use to make your movie more interesting. You assemble a movie by dragging these assets from the Collections area into the Timeline or Storyboard.
- The Preview Monitor includes controls you can use to preview the movie you’re working on in the Timeline or Storyboard, or individual clips in the Collections Area.
- The Timeline and the Storyboard are the two windows you will use to arrange video clips, still images, and transitions into a movie. The Timeline and the Storyboard occupy the same space at the bottom of the Windows Movie Maker window. You can click the Show Storyboard or Show Timeline button to switch between the two views.


The Storyboard view shows you a series of boxes you can use to arrange the video clips, still images, and transitions you plan to use in your movie into a sequence.

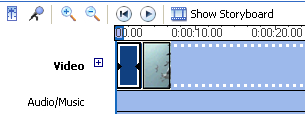
The Timeline view shows you the individual tracks that make up your movie in a linear layout.