Before you can start chatting with someone on Windows Messenger, you will first have to add them to your contact list. In other chat programs, such as AIM, contacts are known as buddies.
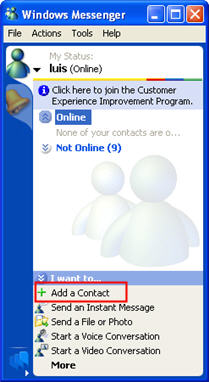
To add a contact in Windows Messenger, click on Tools, Add a Contact, or use the Add a Contact link at the bottom of the Windows Messenger window.
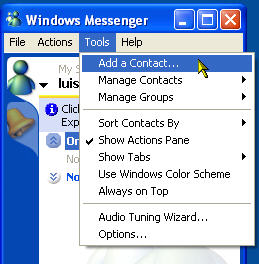
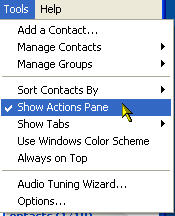
If you do not see the Add a Contact link, show the actions pane by selecting Tools, Show Actions Pane.
Once you select Tools, Add a Contact, the Add a Contact wizard will start. On the first screen, you can choose to search for a contact or to just add the contact using their email address or sign in name.
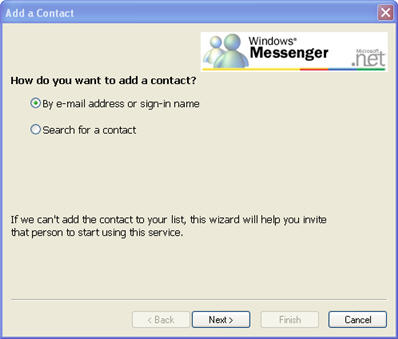
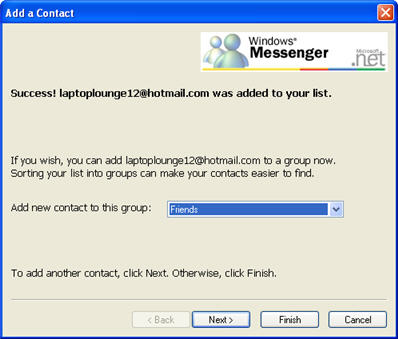
If you already know your contact’s Hotmail email address, leave the “By e-mail address or sign-in name” option checked and click on Next. You can then enter your contact’s full Hotmail email address and click on Finish to add them to your contacts list.

If you have a lot of contacts, you can set up groups to organize them into categories such as Family and Friends. If you already have groups set up for your account, the Add a Contact wizard will allow you to select the group you want to assign to each new contact.
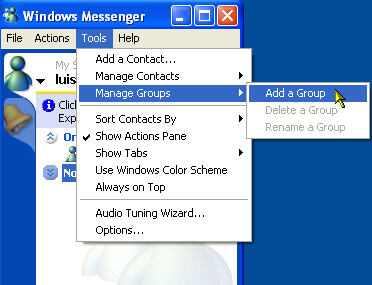
To create a new group, select Tools, Manage Groups, Add a Group and enter a name for your new group.
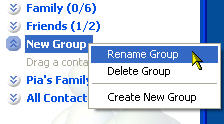
You can then drag and drop contacts from the All Contacts list into one of your groups in the Windows Messenger window. You can rename or delete the group by right-clicking on it to open up a context menu with these options.
By default, your contacts will be sorted by the groups you create. You can also sort them by their status, which is divided into online and offline contacts. You can only start a chat with the contacts that appear in the online group. To view your contacts by status, select Tools, Sort Contacts By, Online/Offline.
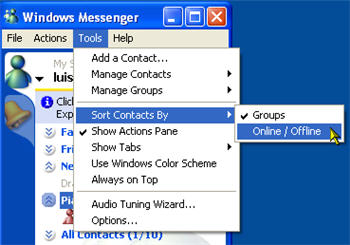
You can return your contacts list to show all of your groups by selecting Tools, Sort Contacts By, Groups.