There is currently no way to add alternative text to images in a document created with Microsoft Office 2008 for the Mac. However, you can take advantage of the fact that the Mac has the ability to print to a PDF document as a built-in feature of the operating system. You can then use Adobe Acrobat to add the alternative text to the images in your PDF document.
- Alternative Text in Adobe Acrobat Video Tutorial
- Video Tutorial: Larger Version (.mov)
- Directions (HTML)
- Print Directions (Tagged PDF)
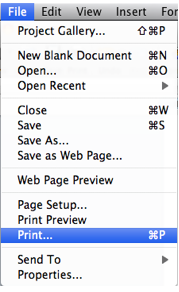
To export your Word 2008 for the Mac document as a PDF document:
- Choose File, Print.
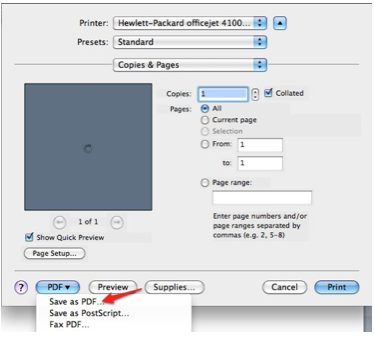
- Select the PDF button at the bottom of the Print window and choose Save as PDF.
- Choose a save location on your computer and select Save.
To add the alt text with Adobe Acrobat:
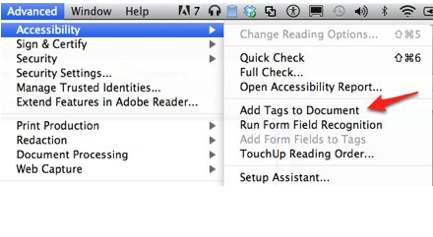
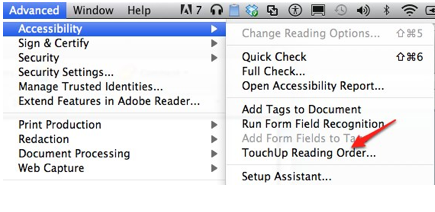
- Open your document with Acrobat and choose Advanced, Accessibility, Add Tags to Document to add the necessary tags to the document.
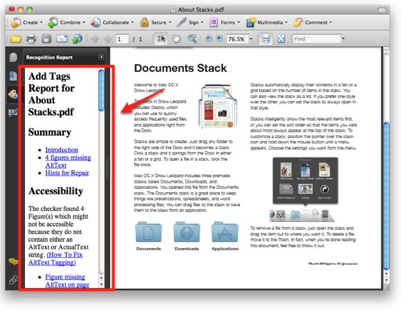
 Once the tags have been added you should see a panel on the left side with any warnings for missing alt text.
 - To add the alt text, choose Advanced, Accessibility, Touch Up Reading Order.
- Look for the image(s) that have a warning of “Figure – No alternate text exists” on them, then right-click on each image and choose Edit Alternate Text.

This will open a popup window where you can add the alternate text.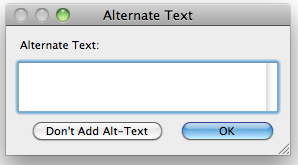
- For images that should have null alt text (images used for decoration), draw a marquee around the image(s) with the crosshairs and choose Background from the Touch Up Reading Order panel.
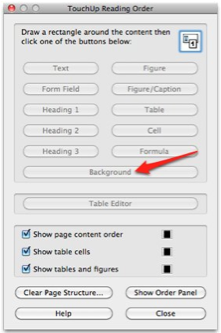
Marking up an image with the Background attribute will allow a screen reader to skip that image.