MovieCaptioner is a program from Synchrimedia (www.synchrimedia.com) that makes it easy to add closed captions to QuickTime videos on the Mac. MovieCaptioner can caption movies with the following extensions: .mov for QuickTime movies that will be viewed on a computer with QuickTime Player or iTunes, and .m4v for movies that will be viewed on an iPod, iPhone or iPad.
- Captioning Video Tutorial
- Video Tutorial: Larger Version (.mov)
- Directions (HTML)
- Print Directions (Tagged PDF)
To caption a QuickTime movie with MovieCaptioner:
- Launch MovieCaptioner by selecting the application’s icon in the Applications folder or the Dock.
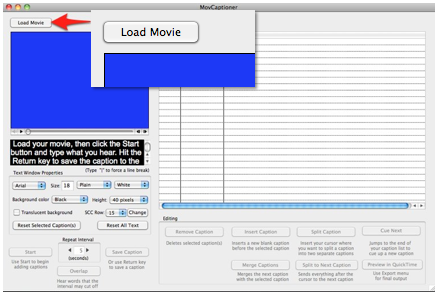
- Once the program opens, select Load Movie and locate the movie you will be captioning. For a movie that will be viewed on an iPod, iPhone or iPad, the movie should have the .m4v extension.
- When prompted, save the MovCaptioner project file.
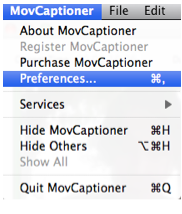
- Open the MovCaptioner preferences by choosing MovCaptioner, Preferences.
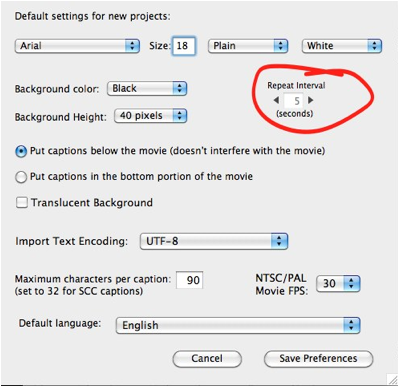
- Select the default settings for your caption text and background, and set the Repeat Interval. This setting will determine the amount of video MovCaptioner will loop through as you work on each caption.
- To create your first caption, select Start and as you listen to the video, type the caption text in the area below the video preview window and press Return to move to the next caption.
- When you’re done with all the captions, choose Export, Transcript (with timecode). This will create a backup of your captions.
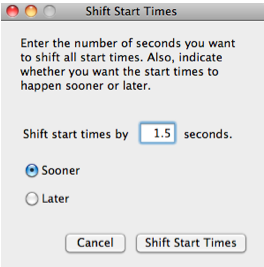
- To adjust the timing of the captions so there is no lag, choose Edit, Shift All Start Times. Enter 1.5 seconds for the time, select Sooner and then choose Shift Start Times.
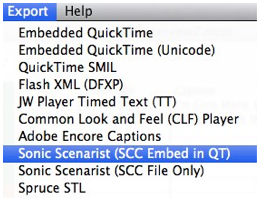
- Export the captions by selecting Export, Sonic Scenarist (SCC Embed with QT).
- Choose a save location for the SCC file. This is the file that contains the timing information for the captions. You can save this file anywhere on your computer. Once QuickTime has embedded the captions into a single movie file you can even delete this file without losing your captions.
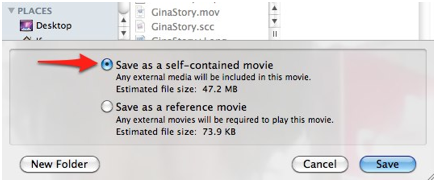
- The captioned video file will open with QuickTime. If you’re satisfied with the captions, choose File, Save As to save the captioned QuickTime movie. Make sure you select “Save as self-contained file” in the QuickTime Save As window.


QuickTime will save the file with the .mov extension even if you captioned a movie that originally had the .m4v extension. To change the extension, open the folder where you saved the file and click once on the file’s icon to select it. Click again and wait a few seconds until the text becomes editable. You will then be able to type over the filename and change the extension to .m4v. You may get a warning asking you to confirm that you really want to change the extension.