NOTE: As of January 10, 2017, Microsoft ceased to support Windows Movie Maker. The Windows Movie Maker application will continue to function, however, and can still be used by those who prefer it. We are maintaining the Movie Maker posts within TechEase because we find that many people are still using the application and come to the TechEase site looking for the specific help we offer.
CAUTION: While installation files that were downloaded directly from Microsoft are safe, there are now many reports of non-Microsoft scam websites offering malware versions of Movie Maker for download. While this malware may function at first, it eventually will demand payment for functions such as saving a file. Never download software from an untrusted source.
The first step in creating a movie with Windows Movie Maker is to capture the video you shot with your video camera so it is on your computer’s hard drive.
To capture your video:
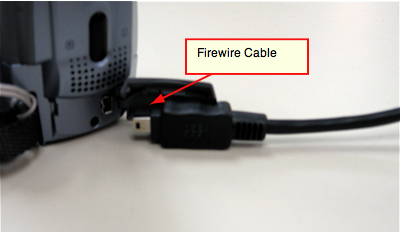
- Connect your camera to the computer using a Firewire cable.
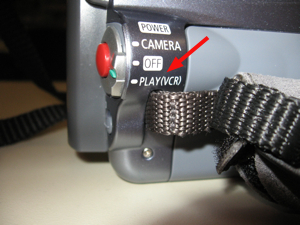
- Make sure the camera is turned on and in playback mode (this setting will vary with your camera but will usually be labeled Play).
- The camera should be recognized by Windows XP and the Video Capture Wizard should start automatically. Select Capture Video on the first screen of the wizard and click on OK.
- Enter a file name for the captured video and slect a save location, then click on Next.
- Select a capture setting from the Video Setting screen:
- Best quality for playback on my computer (recommended):
This option will result in smaller files. Use this option if you are capturing a long video or if your computer is running low on disk space. The format used for this option is WMV, which is a proprietary Microsoft format. You will only be able to use the captured video with other Microsoft programs. - DV-AVI:
The DV-AVI option will result in the best quality but will require the most space on your hard drive. You can use this option if you are only capturing a short section of your tape.
- Select Capture the entire tape or Capture parts of the tape, then click on Next. You can also select to show a preview while you’re capturing the video from your camera.
- As the video is captured to your computer you will be able to see it in a preview window and the audio will play through your speakers. Click on Stop Capture when you want to stop the capture.
- Movie Maker will split the video into clips and it will add them to your video collection.
If the Video Capture Wizard does not open up automatically when you connect the camera, you can manually start a capture by opening Movie Maker and selecting Capture from video device in the Capture Video section of the Movie Tasks pane.