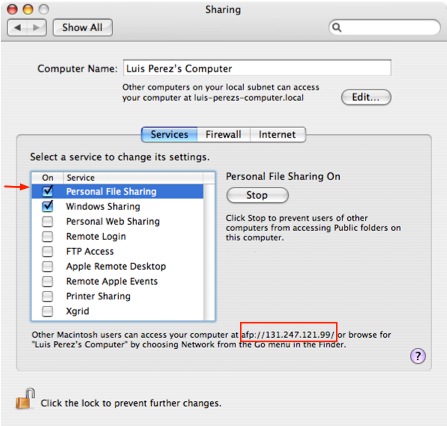
To share files with another Mac over the network, you must first enable file sharing by selecting the Sharing icon in the System Preferences (it is found under Internet and Network). In the Services tab of the Sharing window, make sure the box next to Personal File Sharing is checked. If Personal File Sharing is not enabled, click on the Start button to enable it. While Personal File Sharing is selected, you will see the address you need to use to connect to the file sharing Mac at the bottom of the window. Write down this address, as you will need to enter it on the other computers on the network if you want to connect to the file sharing Mac.

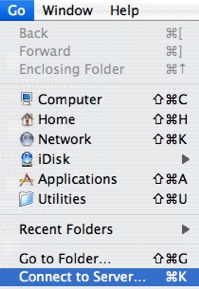
Once you have Personal File Sharing enabled on the file sharing Mac, you can connect to it by going to another Mac and selecting Go, Connect to Server (or Command + K) from a Finder window.

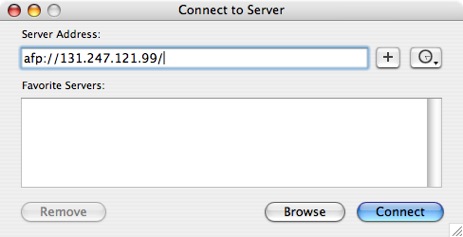
When the Connect to Server window opens, enter the address you wrote down in the Server Address box and click on Connect.

You will then be asked to enter a user name and password for an account on the Mac sharing the files. Once you connect, the drive for the Mac sharing files will be mounted on your desktop. You can open it as you would any other folder to copy files from the other computer to the one you are on.