If you only have one printer in your classroom that you want to share with several student computers, you can connect that printer to your computer and then share it so that it is accessible from any computer in the room.
Two things need to be configured on the host PC to make a printer accessible to other computers:
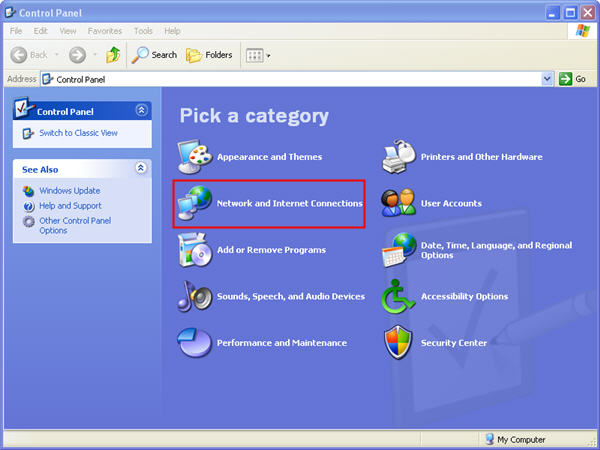
- File and Printer Sharing must be enabled on the PC where the printer is connected. Go to the Control Panel (Start, Control Panel) and then click on Network Connections.

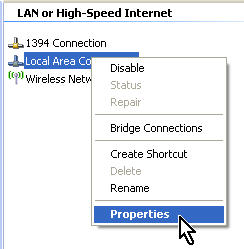
Right click on your network connection and select Properties.

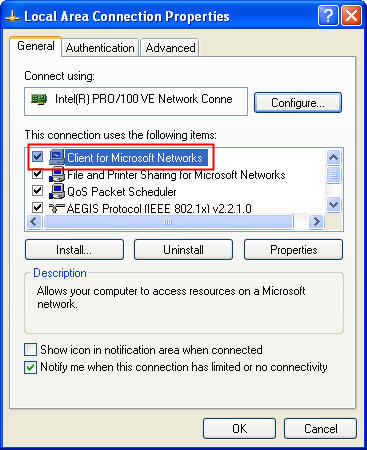
Make sure there is a checkmark next to File and Printer Sharing for Microsoft Networks.

If you do not see this as an option, you may have to install this Windows component. First click on Install, then select Service, and check File and Printer Sharing for Microsoft Networks. You may need to insert your Windows XP CD to install this component.
- The printer must be shared on the network: Once you have enabled File and Printer Sharing, you must share the printer as follows:
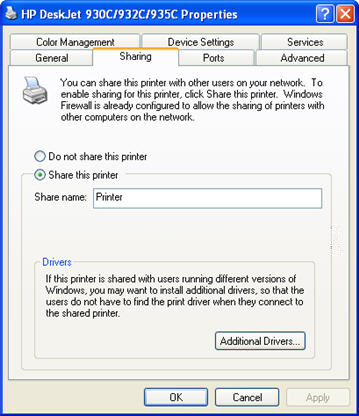
- Right click on the printer to be shared and select Sharing…(or select Properties and then switch to the Sharing tab).

- Select Share this printer.
- You can assign a name for your shared printer. This is the name that will visible when you browse the network from the computers where you want to access this printer.
Once you have shared the printer on the host PC, you can use the Add Printer Wizard on the other machines to add drivers for it. The process is very similar to adding a local printer, but you will select A Network printer or printer attached to another computer when you come to the Local or Network Printer screen.
- Right click on the printer to be shared and select Sharing…(or select Properties and then switch to the Sharing tab).