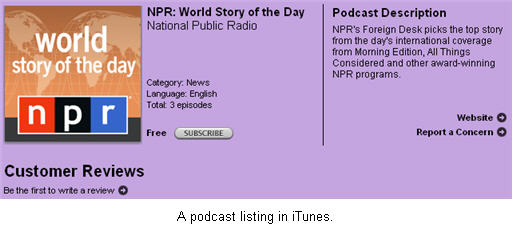
Podcasting means making digital audio or video files available on the internet in such a way that others can set their computers to automatically download new episodes in a series as you post them. There are as many types of podcasts as there are topics. For example, someone could publish a podcast about fly fishing—or gardening, or politics, or polka music. You might find a listing describing this podcast on a podcast directory such as Podcast Alley or the podcast directory in iTunes.

iTunes Podcast Directory
You can then subscribe to that podcast (usually for free) and your computer will automatically download a new episode whenever it is available.
In that way, it’s like Tivo for your computer. You tell it what you want to listen to or watch, it records all of the episodes, and you listen to them at your convenience—on your computer, on your iPod, or any other device that plays digital music or video files.
If you are interested in creating a podcast, here are the general steps:
- Create the content. At a minimum, you will need to have a microphone you can use to record the audio on your computer. If you’re using an iBook or PowerBook, you can use the built-in microphone or the microphone built into the iSight camera if you have one, but for better quality you should invest in a good external microphone or a headset like the ones used for online chatting. If your Mac does not have a line-in jack, you will need to use a USB microphone or headset to record your audio.To edit your audio for an audio only podcast, you can use Garageband, which is part of the iLife suite. The latest version of Garageband even includes an interface specifically designed to make podcast recording and editing easier.
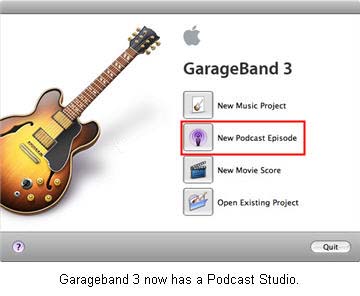 The Podcast Studio in Garageband even allows you to create enhanced podcasts that include chapter markers that can be used by our listeners to navigate through the different segments in the podcasts. Each chapter marker can include a picture with a link to a website and a title.If you have an older version of Garageband, you can still create an enhanced podcast by using a free program called ChapterToolMe. With ChapterToolMe, you record and edit the audio content with Garageband, then you drag and drop the exported audio file (it must be exported from Garageband and converted into an AAC file in iTunes) into the ChapterToolMe interface, which allows you to add chapter markers with images and links.The latest type of podcast is the video podcast that can be played on the new video iPod. You need to have a video camera (or you can use your iSight camera in a pinch) to record a video podcast. These podcasts are video files that are edited with iMovie, QuickTime Pro, or Final Cut Pro and saved in a format that can be played on the small screen of the iPod.
 - Put the audio or video content on the internet. Before you can upload your audio, enhanced or video podcast, it must be in one of the formats supported by iTunes or other software used to manage and play podcasts. With video podcasts, it is possible to create a version that will fit the small screen on the iPod. The latest version of iLife includes the option of exporting video files directly into an iPod-compatible format from within iMovie (QuickTime Pro includes a similar option). Once you have your file in the right format, you can post the file on the internet using the same account you use to publish your web pages. Note that podcast files can be quite large (even more so if you are creating a video podcast), so you may want to check on the space provisions of your provider before you start uploading podcasts.
- Create a blog that supports podcasting. There are many free blog sites, such as WordPress, available on the internet. Whatever you use, make sure that it supports audio attachments.
- Attach the audio content to a blog posting. You’ll create a new post and add a link to your audio file at the end of it.
Once you’ve done all of that, you are podcasting. Your blogging service should create a feed address you can use to submit your podcast to a podcast directory. This address is often found in the settings or options area of your blog. You can add new episodes to your podcast anytime by posting a new blog entry with a reference to another audio file.
Another way to create a podcast is by using a website such as PodOmatic or Odeo. Both websites allow you to record your podcast using your web browser. You do not need to download any software to your computer. As long as you have the Flash plugin installed for your web browser, you can use the Flash controls to record the audio for your podcast using these websites. Each of these sites will also create an RSS feed for your podcast.
To allow other people to subscribe to your podcast you need to let them know your feed address. Once they have that address, they can go into iTunes (on either Mac or Windows) and select Advanced, Subscribe to Podcast…

If they enter a valid address, they will then be subscribed to your podcast and new episodes will be downloaded to their computer on a set schedule specified in their iTunes preferences.
See It In Action:
The movies below show you how to create an enhanced podcast on the Mac using Garageband 3 (included with iLife 06). These movies are in the .mov format and require Quicktime player.
- Setting up your microphone or headset (59s, 1.4 MB)
- Recording (1m32s, 16.3 MB)
- Editing ( 57s, 10.2 MB)
- Adding Loops (54s, 9.8 MB)
- Importing Music from iTunes (33s, 6 MB)
- Using Ducking (39s, 7.1 MB)
- Adjusting Volume Levels (34s, 6 MB)
- Adding Images (42s, 7.7 MB)
- Editing Images (37s, 6.8 MB)
- Adding Chapter Markers (35s, 6.2 MB)
- Exporting to Disk (1m5s, 11.7 MB)
- Sharing to iTunes (38s, 6.8 MB)
- Converting to MP3 Using iTunes (1m18s, 14.2 MB)
- Uploading to a Web Server using Fugu (1m10s, 12.7 MB)
- Creating an RSS Feed File (2m14s, 24.4 MB)
- Sharing to iWeb (24s, 4.4 MB)
- Creating a Podcast Page in iWeb (50s, 9.1 MB)
- Subscribing to a Podcast in iTunes (32s, 5.6 MB)